The Eggs And The Animals They Contain:
The eggs below are in the order in which they appear.
Each egg lasts 24-48 hours. If you're looking for a particular animal, you'll want to save up your gems for when it's egg comes back around. Each egg will cost you between 850-900 gems. Once you get all of the animals in an egg, that egg then becomes a "Shiny Egg" and it's price drops down to 500-550 gems.
I'll add more animals as they become available!
(I'm not going to keep updating the picture of the eggs, it's a PITA!!)
Below is a video that explains the animals, but, I'll go into more detail.
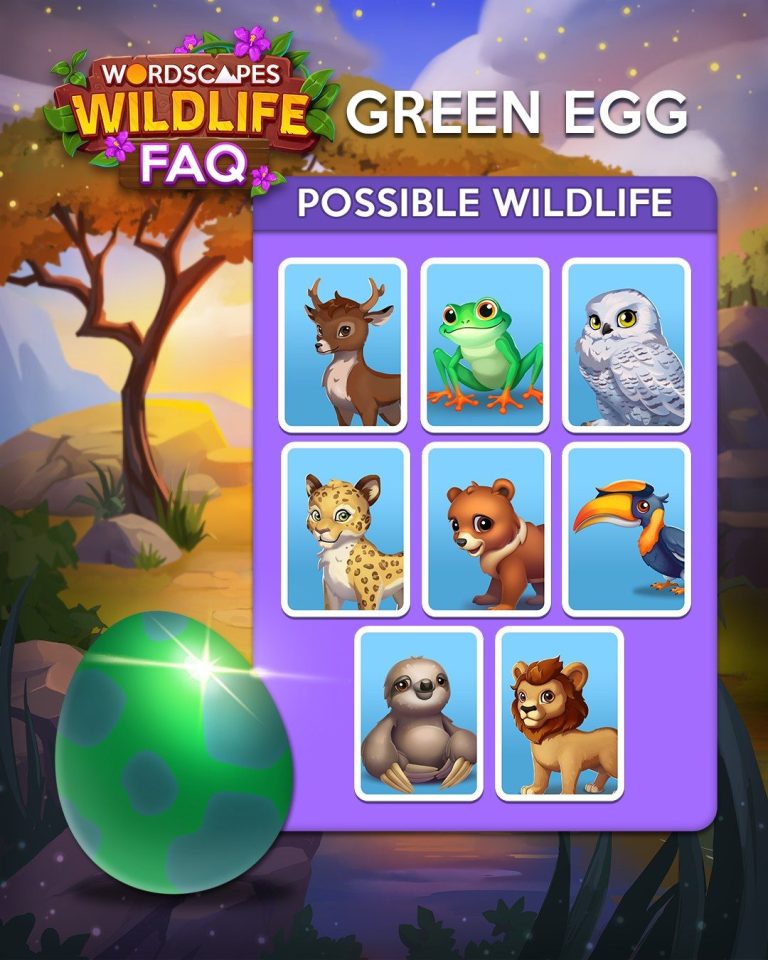
1.
Deer---------------------------Brilliance
Tree Frog-------------------Binoculars
Snowy Owl-----------------Cocoons
Leopard----------------------Stars
Brown Bear Cub--------Cocoons
Hornbill---------------------Cocoons
Sloth---------------------------Binoculars
Lion----------------------------Stars
Kangaroo--------------------Brilliance
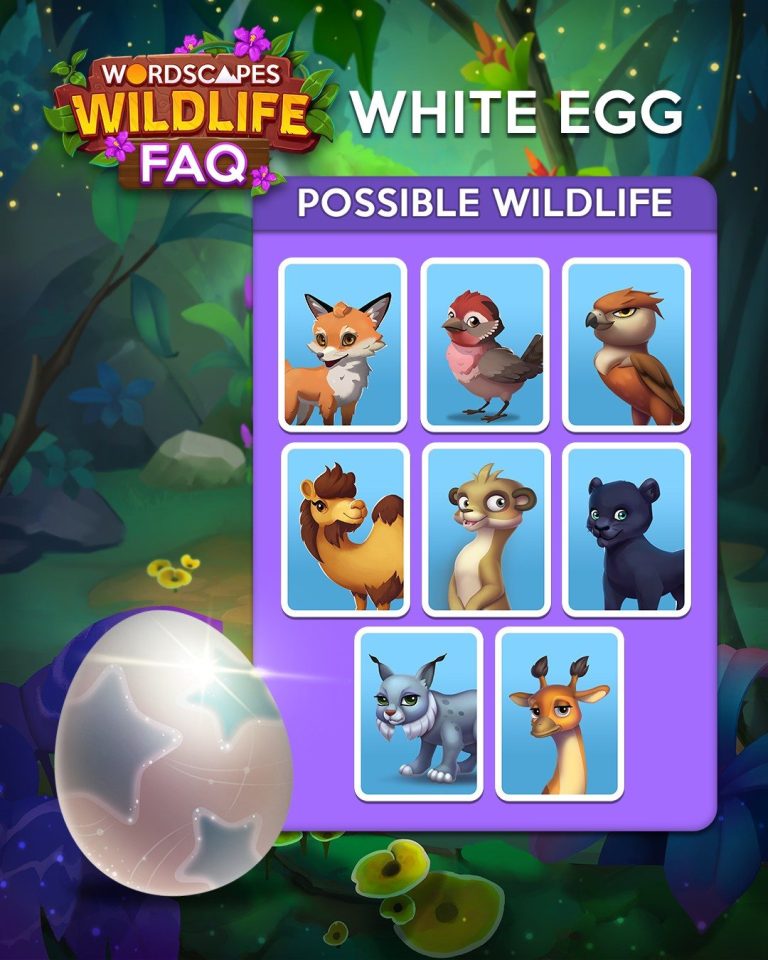
2.
Red Fox-----------------Bees
Finch---------------------Brilliance
Red Goshawk--------Cocoons
Camel--------------------Binoculars
Meerkat-----------------Stars
Panther-----------------Stars
Lynx----------------------Bees
Giraffe-------------------Stars
Kiwi-----------------------Cocoons
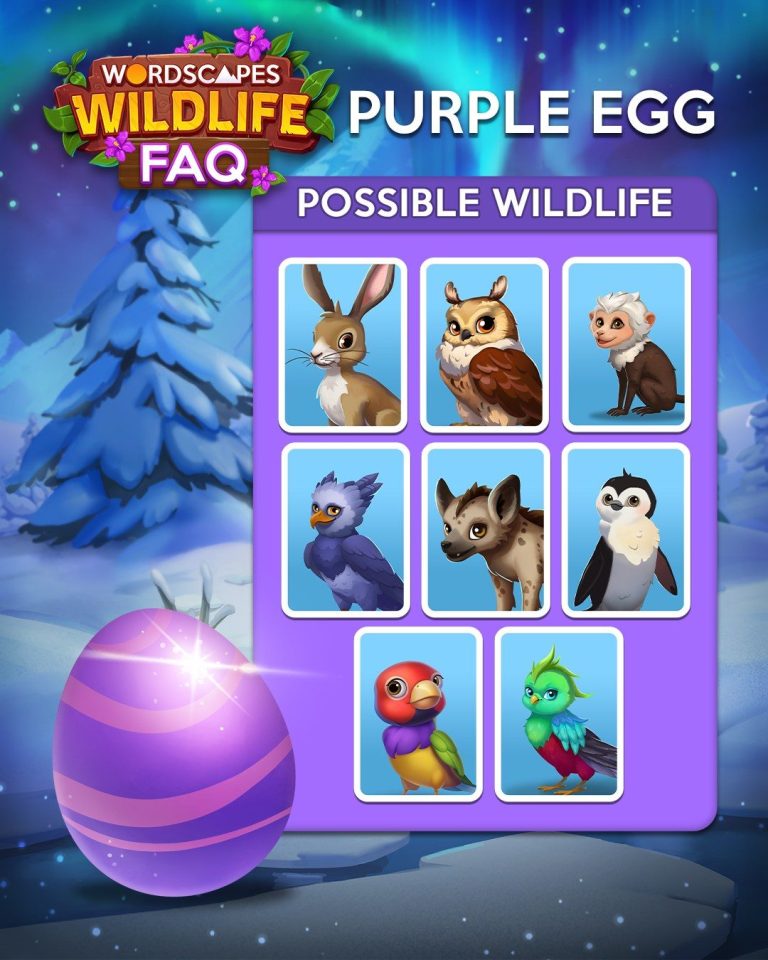
3.
Savannah Hare----------Stars
Long-Eared Owl---------Binoculars
Capuchin--------------------Bees
Harpy Eagle---------------Brilliance
Hyena-------------------------Stars
Penguin----------------------Binoculars
Gouldian Finch----------Brilliance
Quetzal-----------------------Cocoons
Pangolin---------------------Bees
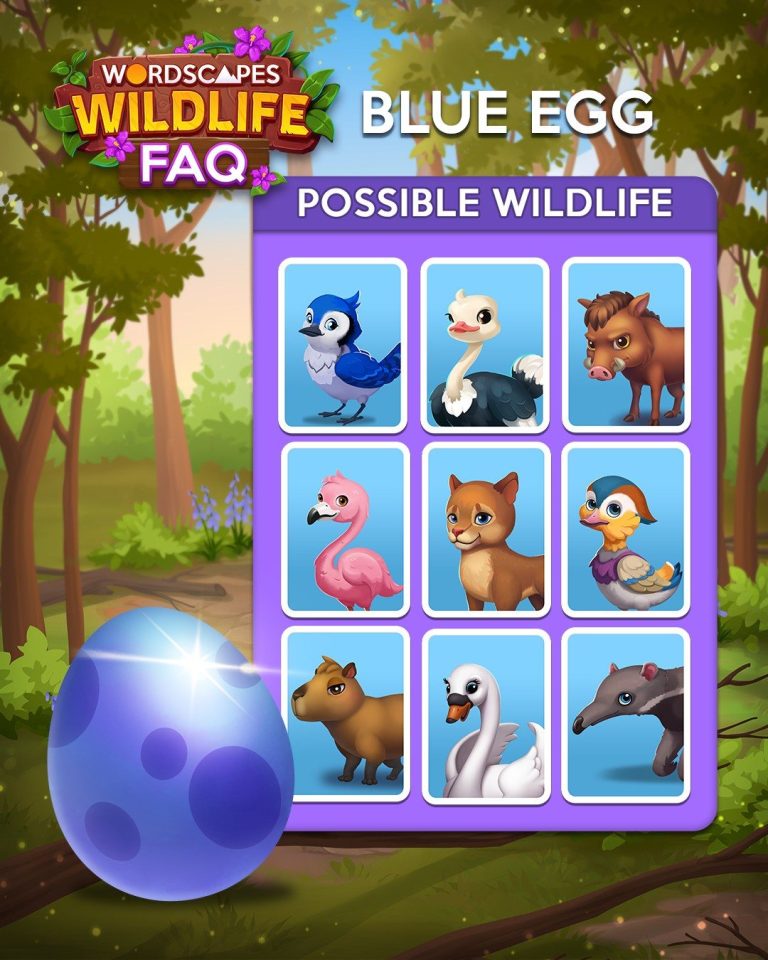
4.
Blue Jay-------------------Brilliance
Ostrich--------------------Cocoons
Warthog-------------------Stars
Flamingo------------------Brilliance
Puma-------------------------Stars
Mandarin Duck--------Brilliance
Capybara-------------------Stars
Swan--------------------------Binoculars
Anteater--------------------Bees
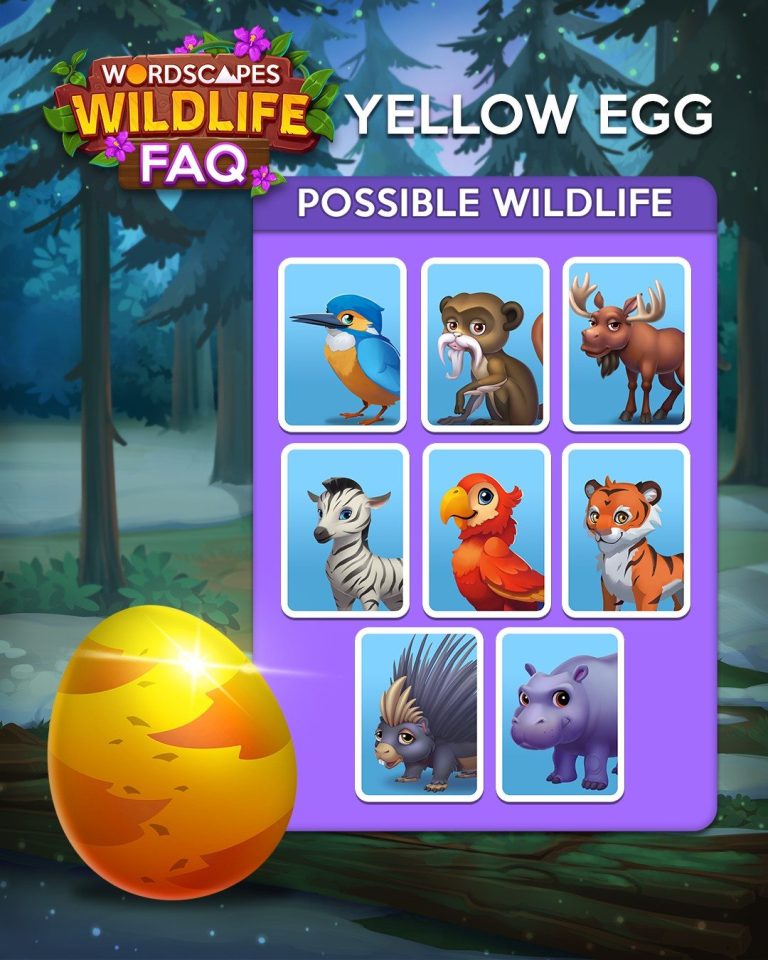
5.
Kingfisher---------Brilliance
Tamarin------------Stars
Moose----------------Binoculars
Zebra-----------------Bees
Macaw---------------Cocoons
Tiger------------------Stars
Porcupine----------Cocoons
Hippo-----------------Binoculars
Wombat-------------Stars
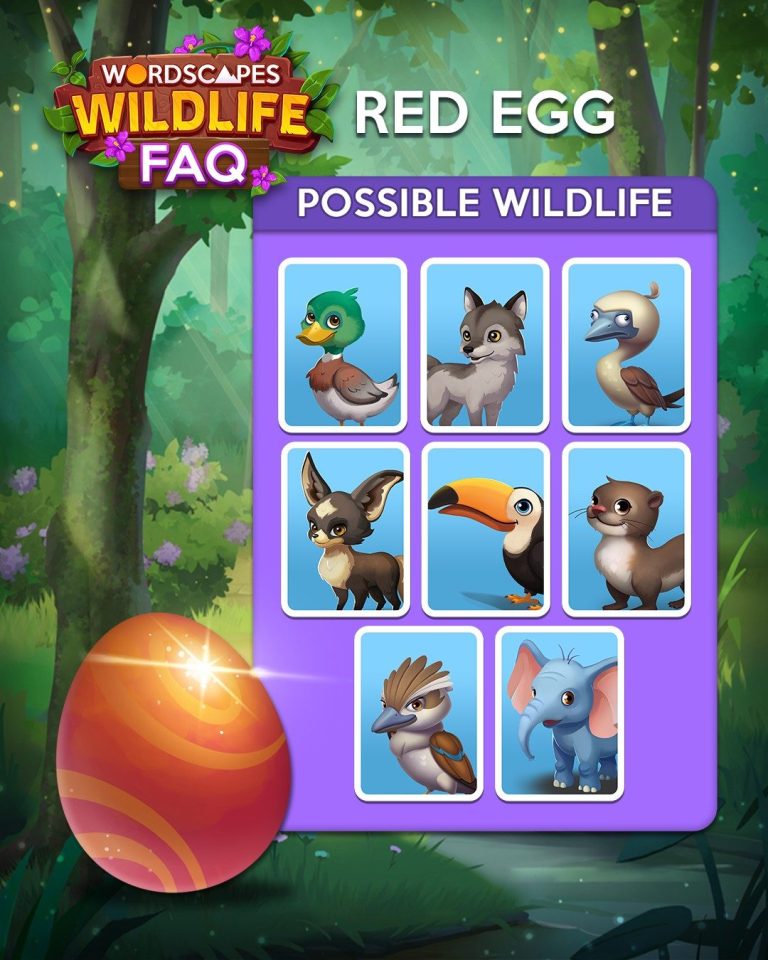
6.
Mallard Duck----------------Brilliance
Wolf--------------------------------Stars
Blue Footed Booby---------Binoculars
Bat-Eared Fox----------------Binoculars
Toucan---------------------------Cocoons
Giant River Otter-----------Bees
Kookaburra-------------------Cocoons
African Elephant----------Binoculars
Skunk-----------------------------Heart Gems
There are also animals you can buy as well as "Rainbow Eggs" that are used to bring new animals into the game. Later, they're put into their new, regular egg.
Not Shown:
Spooky Black Cat (Pay to Get)------Binoculars
Goofy Gobbler (Pay to Get)-----------Bees
Santa Claws (Pay to Get)---------------Heart Gems Only
Rock (Pay to Get)---------------------------Brilliance
Snowman (Pay to Get)-------------------Binoculars
Hedgehog (Pay to Get)-------------------Brilliance
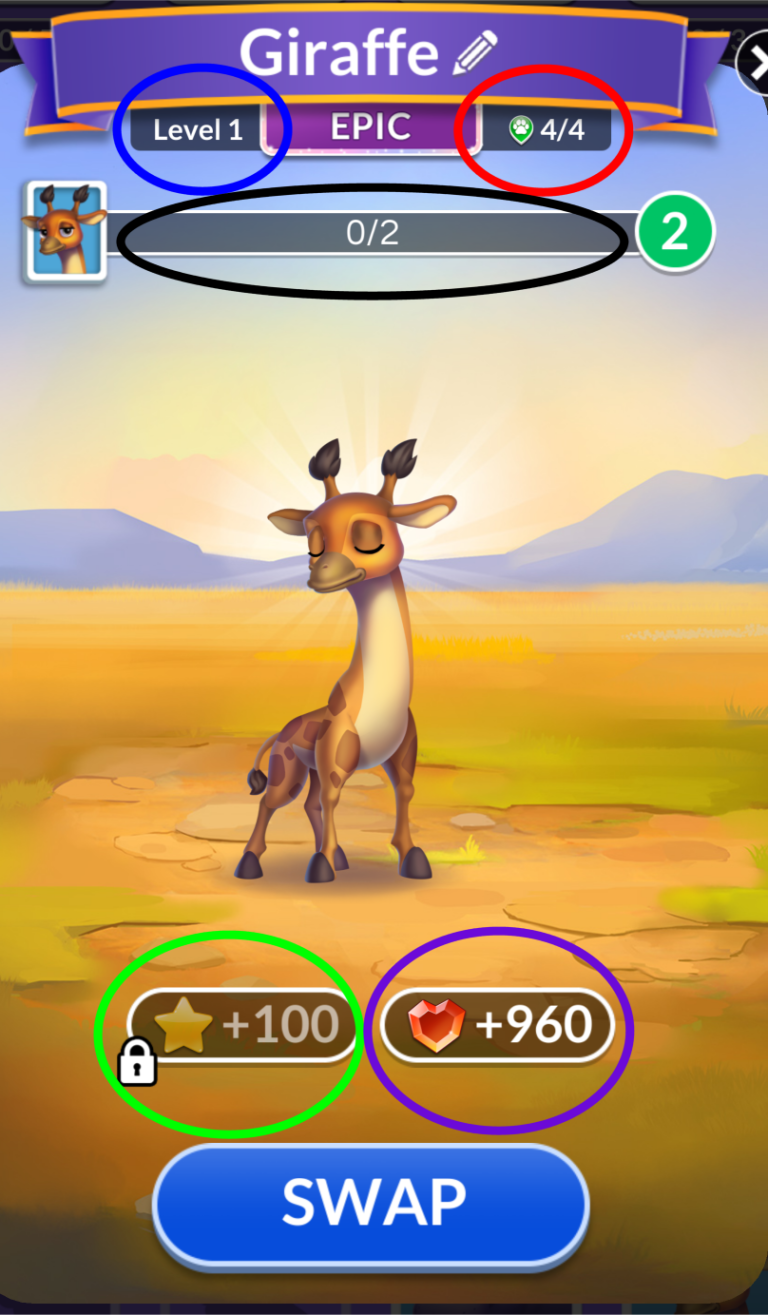
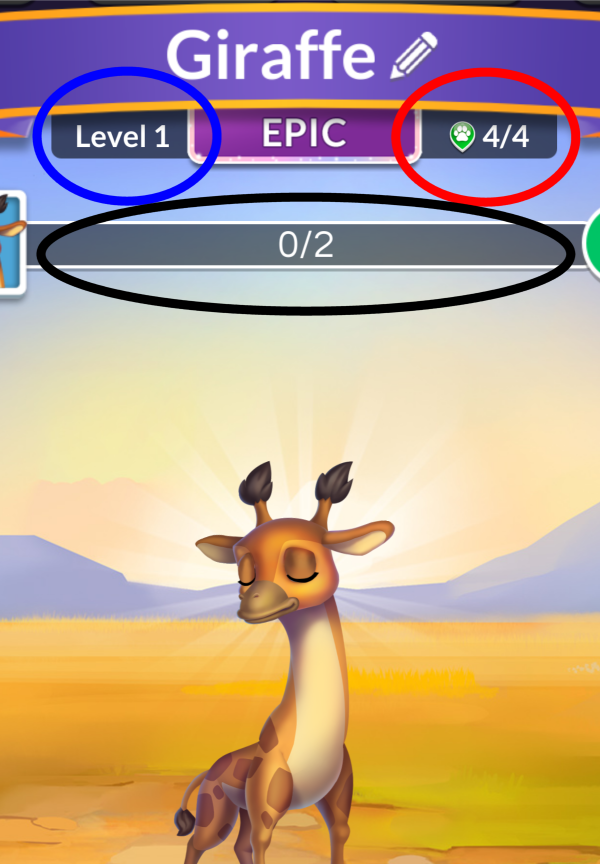
Getting To Know Your Animals
Blue Circle (Top Left Corner)---The animal's current level. The maximum level is 7.
Black Circle (Top Middle)---How many more times you need to "hatch it" to reach the next level. In this case, going from Level 1 to Level 2 and it needs to be hatched 2 more times.
Red Circle (Top Right Corner)---Each animal will do
different activities like eating, drinking, playing and
dancing. The fraction means Uses Left/Max Uses.
Since it's at 4/4, I can use it 4 times.
When it gets down to 1/4, the animal will sleep after it completes it's last activity.
This is a very important factor in preparing your
animal for the tournament. We'll be going into more detail further down.
Green Circle (Bottom Left Corner)---The reward it gives after it completes it's activity.
You'll notice that it gives 100 stars but it's locked.
The Giraffe gives stars for the tournament. When the tournament is active, it will be unlocked.
Purple Circle (Bottom Right Corner)---The amount of
gems you'll receive after it completes it's activity.
Getting Your Animals Ready For The Next Tournament
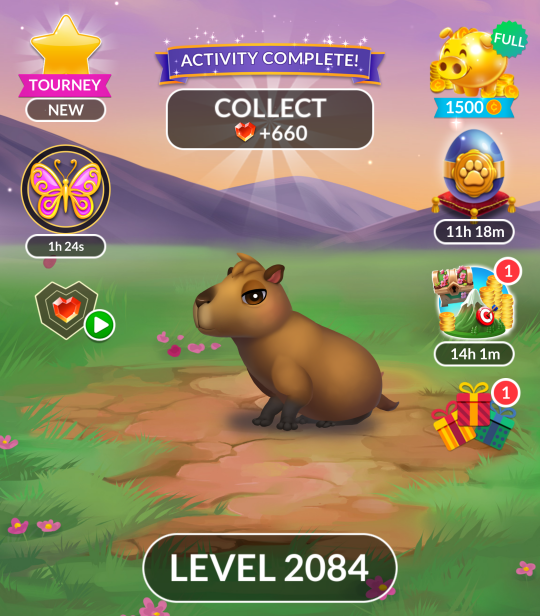
PRIMING: This is where you have an animal do an activity, but when it's done, you DON'T collect from it, but you swap it out for another animal. Do this for all the "Star" animals!
Priming is done during the week, start as soon as the tournament ends. Start off with the ones that take 8 hrs to complete their activity. I do those ones while I'm sleeping or while at work. The others can be done at any time BEFORE the next tournament starts
As you can see with the Capybara to the left, it's done and wants me to collect the reward.
The Capybara gives tournament stars, but since the tournament isn't active, you don't see them.
BURNING OFF: This is where you will collect from the animal when it's completed it's final activity before going to sleep, but won't get it's reward other than the gems.
Looking at the giraffe to the left and the red circle in the upper right corner; the 4/4 means that it has all 4 of it's uses available. When it's down to 1/4, it's going to go to sleep when it's done with it's next activity. We DON'T want that to happen during the tournament!! When it's done, collect from it, it's now been burned off! Let it sleep and then prime it.
Note: the above steps are for the tournament, but can also be done for the animals in the other events that use Binoculars or Cocoons.
A nice little animal trick to know:
Have an animal start an activity. While it's doing it, open an egg. If you level up a different animal or unlock a new one, swap it out. The previous animal will complete it's activity without costing you any coins!! It also works if you buy a new animal. This can be done multiple times and is very useful during the tournament!!
Thanks Blane for discovering this and sharing it with the team!!!!

© Copyright. All rights reserved.
We need your consent to load the translations
We use a third-party service to translate the website content that may collect data about your activity. Please review the details in the privacy policy and accept the service to view the translations.